
Article Contents
Video Demonstration: App Reconnection
Understanding the Gen-24 Inverter UI
Video Demonstration: App Reconnection
Initial Steps
- Ensure Correct Wi-Fi Connection: All inverter connections require a 2.4GHz home internet connection. If your current internet plan and router only allow 5.0GHz connection, contact your internet provider to resolve this issue.
- Wi-Fi Strength: Ensure that the connection to your inverter is strong enough to operate. If your connection isn't strong, you may need to consider the use of a Wi-Fi extender. There are two methods of testing your connection:
- Quick Method: Seeing how many bars of internet connection your smartphone or tablet receives when standing next to your inverter.
- Accurate Method: Measuring your connection strength via website or app. We personally recommend using WiFiman by Ubiquiti.
Understanding the Gen-24 Inverter UI
- If the connection is down, you’ll most likely be experiencing a red light above the connection symbol (the right-hand side LED). The goal is to make the LED light up blue.
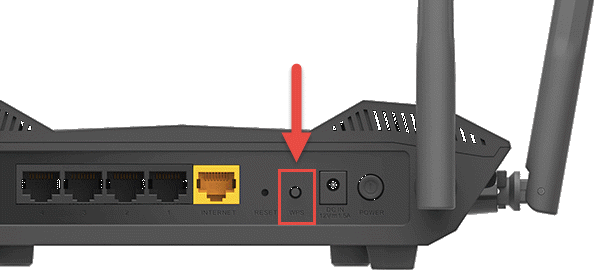
- Between the two LED lights (the power LED and the connection LED), there will be a touch sensitive button. This is used to activate different settings on your inverter.
WPS Method
Step 1: Sync from your Internet Router
- Locate your internet modem. Once located, find the WPS button on your router (if you are using an older router that doesn’t have a WPS option, ignore this method).
- Push and hold it down until its LED lights up (refer to your router’s manual as light commands can vary between models).
Step 2: Initialise WPS mode on Inverter
- Return to your inverter. To activate WPS mode, slowly tap the middle button twice (ensure not to tap too quick, otherwise it will not work).
- The connection LED should now be flashing green. This ensures that the inverter is trying to connect. Give it maximum 30 seconds. The light will first go red and then turn blue a few seconds later. This means your inverter is now connected.
.gif?width=670&height=377&name=Untitled%20design%20(2).gif) |
.gif?width=670&height=377&name=Untitled%20design%20(3).gif) |
- If any reason this method didn’t work, proceed to the manual method of reconnecting the Gen-24 inverter.
Manual Connection Method
|
Step 1: Activating the Inverter’s Connection
|
.gif?width=670&height=377&name=Untitled%20design%20(1).gif) |
|
|
Step 2: Connecting your Device to the Inverter
|
|
Step 3: Accessing Fronius Settings on your Device
|
|
|
|
Step 4: Setting up Wi-Fi
|


.png?width=575&height=324&name=Untitled%20design%20(24).png)
Next Steps
When reconnecting your inverter back to the internet, your home data may be delayed. In majority of cases, your inverter should communicate back to your home monitoring relatively fast. If this isn't the case, give the system 24 hours to reconfigure and the issue should be fixed.
If this process is unsuccessful, raise a support ticket with SolarHub’s Support and Service Team for further assistance.